
Dog Kennel Furniture DIY: How to Build a Stylish and Functional Dog Kennel at Home
As an Amazon affiliate, I earn a commission on qualifying purchases at no extra cost to you.
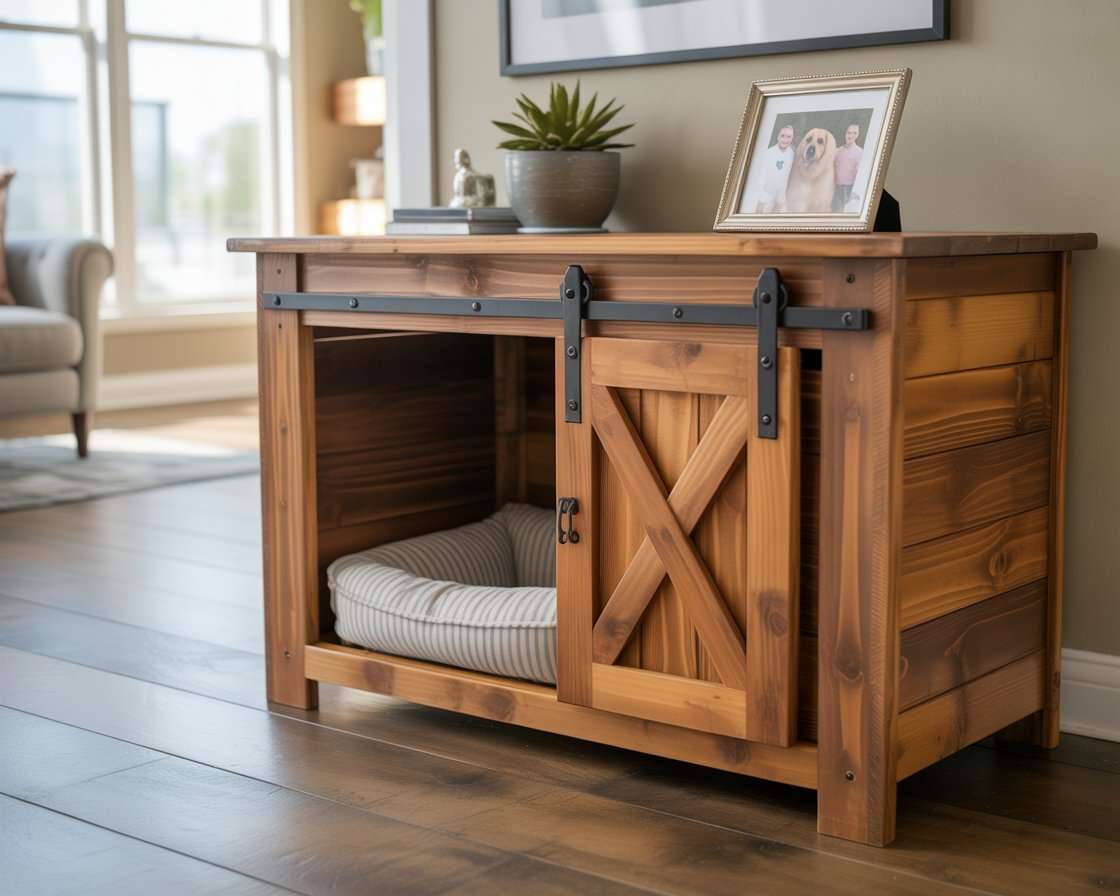
Building my own dog kennel furniture was one of the most rewarding DIY projects I have done.
I wanted something that looks like real furniture, fits my home style, and keeps my dog comfortable and safe.
In this guide, I will explain how I built dog kennel furniture step by step, using simple tools and clear planning.
I will share what worked for me, what to avoid, and how you can customize it for your own space.

Why I Chose to Build Dog Kennel Furniture Myself
I decided to build my own dog kennel furniture because store-bought options were too expensive and also did not fit my space.
I also wanted full control over the size, color, and storage options.
DIY allowed me to match the kennel with my existing furniture while making sure my dog had enough ventilation and comfort.
Most importantly, I saved money and felt proud of creating something useful with my own hands.
Planning the Design and Size
Before cutting any wood, I carefully planned the design. I measured my dog while he was standing, sitting, and lying down.
I added extra space so he could turn around easily and relax. I also measured the area in my home where the kennel would sit.
I chose a design that looks like a side table, so it blends naturally into the living room.
Planning ahead helped me avoid mistakes and wasted materials.
Materials and Tools I Used
I kept the materials simple and beginner-friendly.
I used plywood for the panels and solid wood boards for the frame.
For the front, I used metal bars to allow airflow and visibility. I also picked screws, wood glue, sandpaper, and a non-toxic wood stain.
For tools, I used a measuring tape, circular saw, drill, screwdriver, clamps, and a sander.
If you do not own all tools, many hardware stores rent them at low cost.
Step-by-Step: How I Built the Dog Kennel Furniture
Step 1: How I Measure My Dog (So the Kennel Fits)
I measure three things:
-
Length (L): Nose to base of tail
-
Height (H): Floor to top of head (or top of ears if ears stand up)
-
Standing Width (W): Chest width at the widest point
Then I calculate the inside kennel size like this:
-
Inside Length = Dog Length + 6–10 inches
-
Inside Height = Dog Height + 4–6 inches
-
Inside Width = Dog Width + 4–6 inches
That extra space lets my dog turn around, stretch, and lie down comfortably.
Step 2: Standard Kennel Furniture Measurements I Use
Below are common “finished inside” sizes that work for most dogs. (These are the inside space, not the outside furniture size.)
Small Dog (up to ~25 lb)
-
Inside: 24″ L × 18″ W × 20″ H
Medium Dog (~25–55 lb)
-
Inside: 36″ L × 24″ W × 27″ H
Large Dog (~55–90 lb)
-
Inside: 42″ L × 28″ W × 30″ H
If my dog is between sizes, I always size up.
Step 3: I Add Wood Thickness to Get Outside Measurements
Most DIY kennel furniture uses 3/4″ plywood.
To convert inside → outside:
-
Outside Length = Inside Length + 1.5″ (0.75″ left + 0.75″ right)
-
Outside Width = Inside Width + 1.5″
-
Outside Height = Inside Height + 1.5″ (bottom + top panel thickness)
Example (Medium):
-
Inside: 36″ × 24″ × 27″
-
Outside (box): 37.5″ L × 25.5″ W × 28.5″ H
If I add legs or a tabletop overhang, I account for that too.
Step 4: My Recommended DIY Size (Most Popular)
This is the one I build most often because it works for many medium dogs and looks like a side table:
Medium Dog Kennel Furniture (Complete Example)
INSIDE SPACE: 36″ L × 24″ W × 27″ H
OUTSIDE BOX: 37.5″ L × 25.5″ W × 28.5″ H
TOP OVERHANG (optional): +1″ on each side
FINISHED TOP: 39.5″ L × 27.5″ W
Step 5: Cut List (With Exact Measurements)
Below is a full cut list for the Medium build using 3/4″ plywood.
Medium Dog Kennel Furniture Cut List (3/4″ plywood)
Box Panels
-
Top: 37.5″ L × 25.5″ W
-
Bottom: 37.5″ L × 25.5″ W
-
Left Side: 27″ H × 25.5″ W
-
Right Side: 27″ H × 25.5″ W
-
Back Panel: 27″ H × 37.5″ L
Front Face Frame (1×2 boards recommended)
-
2 vertical pieces: 27″ H
-
2 horizontal pieces: 37.5″ L
(These create a strong front opening and make it look like furniture.)
Door (example door opening)
-
I leave a front opening of about: 26″ H × 18–20″ W (for medium dogs)
-
Door frame built from 1×2 boards to match that opening.
Optional Tabletop Overhang
-
Finished Top: 39.5″ L × 27.5″ W (if I want a furniture look)
✅ If you tell me your dog’s breed/weight (or L/H/W), I can calculate a custom cut list, but you can also use the sizes above as-is.
Step 6: How I Build It
1) I Build the Box First
I attach the sides to the bottom panel using wood glue and screws. Then I add the back panel and finally the top panel. I always pre-drill holes to prevent splitting.
2) I Add the Front Face Frame
I attach the 1×2 boards to the front edges. This step makes the kennel look like real furniture instead of a plain wooden box.
3) I Install the Door
I build a simple rectangular door frame with 1×2 boards and attach it with hinges. For the door center, I use one of these:
-
welded wire panel (strong and clean)
-
metal balusters
-
heavy-duty crate bars
Then I install a latch that cannot be bumped open.
4) I Sand Everything Smooth
I sand all corners and edges until nothing feels sharp. This matters a lot because dogs rub against the opening.
5) I Paint or Stain (Pet-Safe)
I use a low-VOC or pet-safe finish and let it cure fully before my dog uses it.
Step 7: Ventilation and Spacing Rules I Follow
-
I keep bar spacing under 2″ so my dog cannot squeeze his head through.
-
I add airflow on at least two sides (door + one side panel with openings, or door + back vents).
-
I never seal it so tightly that it traps heat.
Optional Upgrades (Measurements Included)
Storage Drawer Underneath
-
I leave 4–6 inches extra height for a drawer base.
-
Drawer inside depth is usually 18–22 inches depending on the kennel width.
Divider Panel (for training)
-
I make it removable and set it about 6–10 inches behind the door at first.
Quick Measurement Summary (Copy This)
-
Small: 24″ × 18″ × 20″ inside
-
Medium: 36″ × 24″ × 27″ inside
-
Large: 42″ × 28″ × 30″ inside
-
Add 1.5″ to each dimension for outside (using 3/4″ plywood)
Adding Comfort for My Dog
After building the structure, I focused on comfort. I added a soft dog bed inside and made sure there was enough airflow.
I also placed the kennel in a quiet corner of the room so my dog feels safe and relaxed.
Comfort is just as important as appearance when building kennel furniture.
Custom Features I Added
To make the kennel more functional, I added a storage drawer underneath for toys, leashes, and treats.
I also used rubber feet under the legs to protect my floor.
These small upgrades made a big difference in daily use.
Safety Tips I Followed
Safety was a top priority for me. I avoided toxic paints and finishes, ensured there were no sharp edges, and used strong latches.
I also tested the kennel’s strength by applying pressure before letting my dog use it.
A safe kennel gives peace of mind.
Mistakes I Avoided (and You Should Too)
I made sure not to build the kennel too small. I also avoided weak materials like thin particle board.
Rushing the process can lead to uneven panels or loose joints, so I took my time.
These small precautions saved me from costly fixes later.
Building dog kennel furniture DIY style was a practical and enjoyable project for me.
It gave me a beautiful piece of furniture that fits my home and keeps my dog happy.
With careful planning, simple tools, and patience, anyone can build a stylish and durable dog kennel at home. If I can do it, you can too.